Setting up a Development Environment
You’ll need a couple of things before you can get started.
- A Java Development Kit (JDK) for Java 17 (recommended) or newer. Temurin Adoptium JDKs are easily available and recommended. You can download them here: Adoptium Temurin Releases
- Any Java IDE, like IntelliJ IDEA or Eclipse.
Visual Studio Code can work, but it takes extra work to get set up.
- We recommend using IntelliJ IDEA as it has the most integrations and is the easiest to use.
Next, you need to decide on whether you want to download the template mod zip or use the GitHub template. If you don’t know how to use git, use the first method. However, it is recommended for you to have at least a GitHub account to get started and familiarize yourself with git quickly.
Template Mod Download (ZIP file)
You can download the template mod from the quilt-template-mod repository.
To download the ZIP file for the template mod, open the GitHub repository,
then go to the < > Code button and press Download ZIP as shown in the following image:
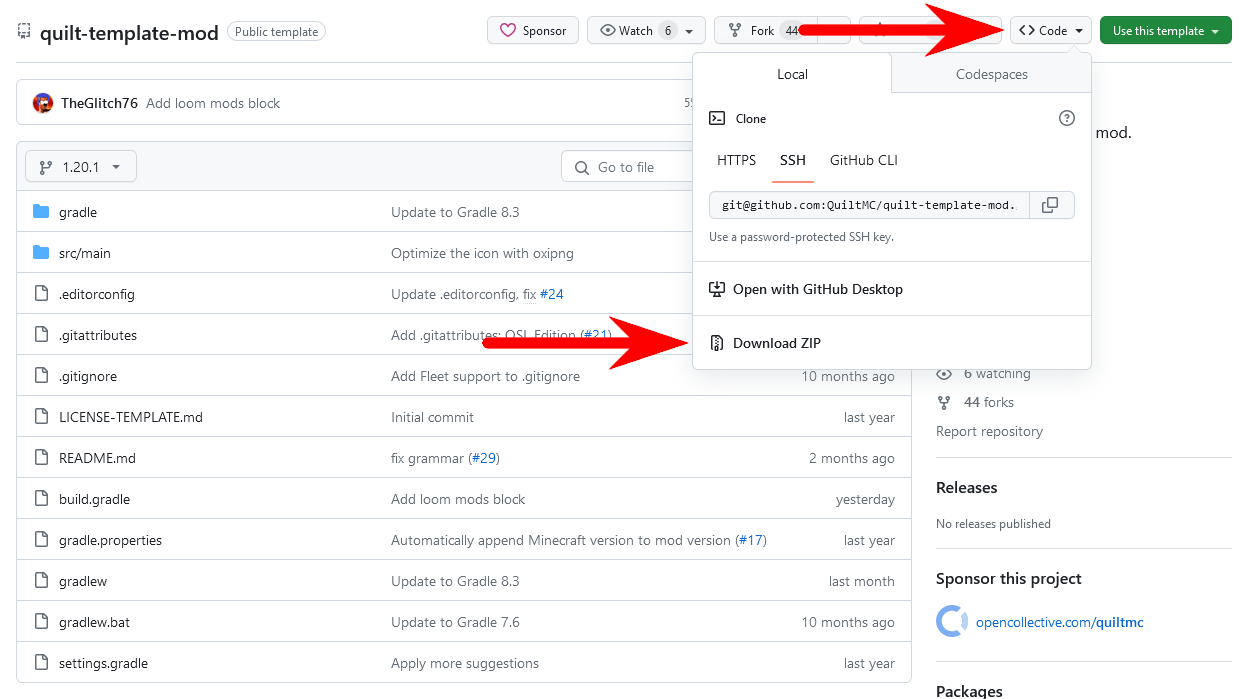
Extract the ZIP file’s contents into a folder of your choosing.
Template Mod Download (GitHub Template)
To use the GitHub template, visit the GitHub repository and click the Use this template button. Follow through the dialog and clone that repository using git. Then you can continue.
Setting up with IntelliJ IDEA
Now you need to set up your development environment. Open IntelliJ IDEA and follow through the initial setup dialog. Then, you need to open the project:
If you downloaded the template mod and extracted it into a folder,
import the project by pressing the Open button in the project listing.
If you made a GitHub repository with the template, use the Get from VCS button.

If you get a window asking if you trust the folder, press Trust Project.
There is a plugin that adds additional support for Minecraft modding projects that is highly recommended. You can get it here: https://plugins.jetbrains.com/plugin/8327-minecraft-development
An Overview Over IDEA
After you open the project, you should see a window looking roughly like this:
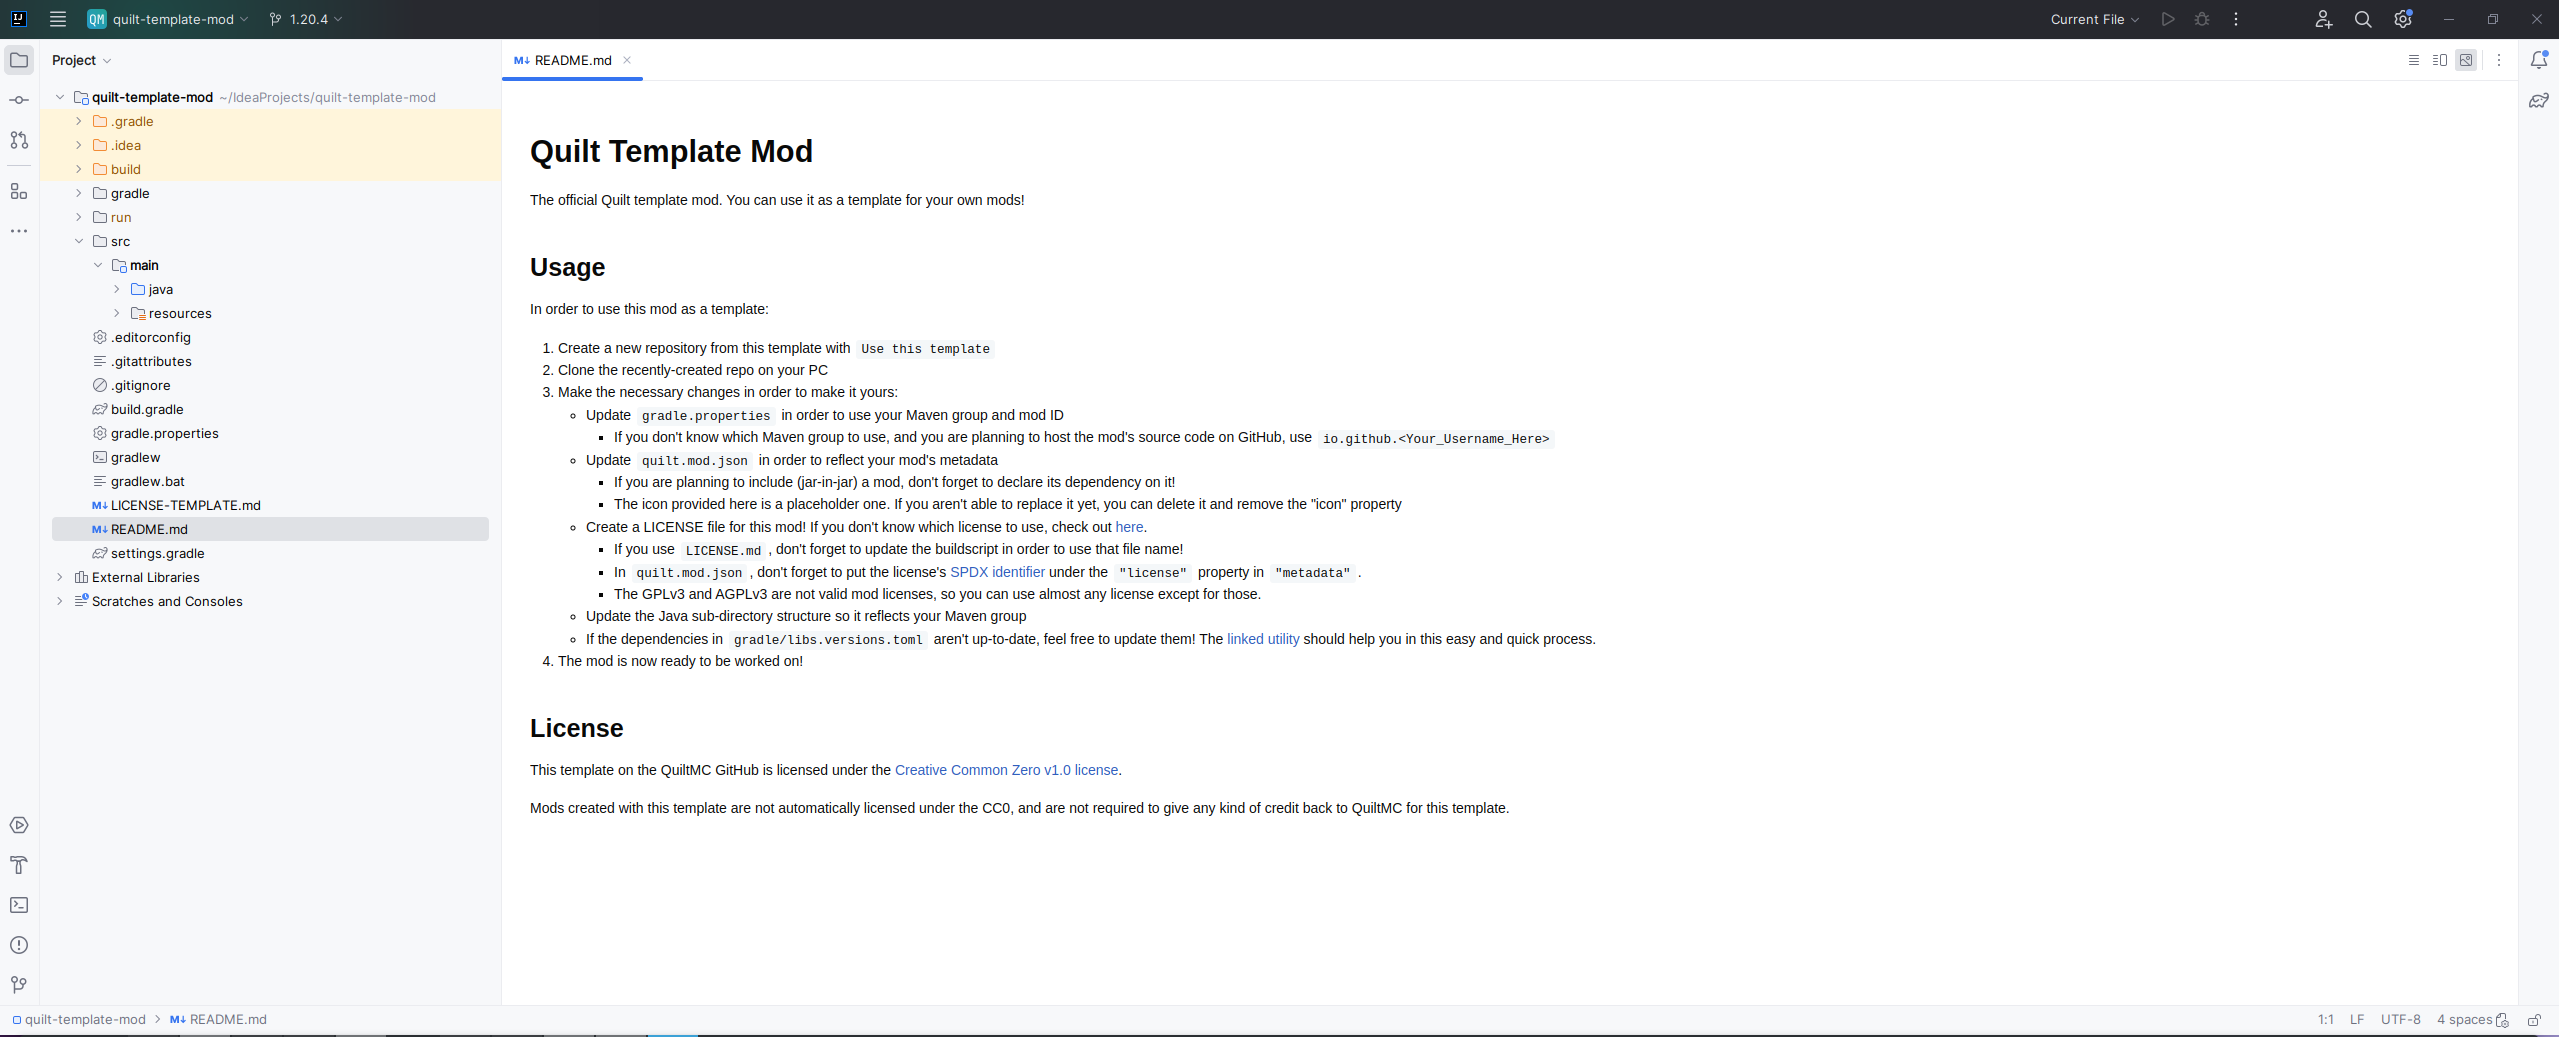
When you open a file, it should open a new tab in the editor in the middle.
Additionally, there are some things you might find not straight away: If you want to rename something, be it a file or a name of a variable or function, you can do so in the context menu under Refactor > Rename
Making the Mod Yours
First you’ll need to make up a name for your mod. For this tutorial, we will use the mod name Bingus Mod.
Based on the name, you also need a mod id. It should be composed of lowercase characters from the alphabet and underlines. Usually, you mod id should be your mod name, but with underscores instead of spaces, hyphens or other special characters. Additionally, there shouldn’t be a mod already using that id. For a mod named Bingus Mod, it would be bingus_mod.
Lastly you need to decide on a maven group. It is used to identify the developer of the mod in a machine-readable scheme and is designed to be unique. It should be a domain you own in reversed. So if you own bingus.example.com, your maven group would be com.example.bingus. If you don’t have a domain (or don’t know what it is), but have a GitHub account, you can use io.github.your_github_username, replace all special characters with underscores again.
Now that you have decided on these things, you can update your mod’s metadata:
First, update the gradle.properties file directly in your project folder to use your Maven group and mod ID.
Change the line beginning with maven_group = to use your mod maven group instead of com.example.
Set archives_base_name to your mod’s ID similarly and ignore all other properties for now. Note that since maven uses hyphens to separate words, you should change the underscores in your mod ID to hyphens accordingly. Here is an example of how the result might look:
# Gradle Properties
org.gradle.jvmargs = -Xmx1G
org.gradle.parallel = true

# Mod Properties
version = 1.0.0
maven_group = io.github.bingus
archives_base_name = bingus-mod
Next, update the quilt.mod.json file in the src/main/resources folder. The quilt.mod.json defines your mod’s metadata, like mod name, author, description, website, but also more development focused metadata such as dependencies, version, mod ID and mod initializers.
You’ll need to update a few things under "quilt_loader", see below for a finalized example:
"group"should be set to the Maven group you specified in yourgradle.properties."id"should be set to your mod’s ID. This should be your mod’s name in all lowercase with underscores instead of spaces."metadata":"name"should be your mod’s name. This does not require any special formatting, unlike your mod’s ID."description"should be a short description of your mod."contributors"can contain entries for anything. Use your name as the key and"Developer"as the value if you don’t know what to put here."contact"can contain entries for anything similar to""contributors", but typically people put a"homepage", a"sources", and a"issues"entry with a valid URL here.- Replace
example_modwith your mod’s ID in"icon".
- In
"entrypoints", replacecom.example.example_modwith your Maven group and mod ID, and theExampleModat the end should be the Java class name for your mod. The Java class name usually is your mod’s name, written inUpperCamelCase. This means that instead of using spaces to separate words, each word starts with an uppercase letter. In contrast tolowerCamelCase, the first letter should be uppercase. For example,io.github.bingus.bingus_mod.BingusMod. - In
"mixin", replaceexample_modin the file name to your mod’s ID.
Your quilt.mod.json should not have any traces of “example” in them anymore.
{
	"schema_version": 1,
	"quilt_loader": {
		"group": "io.github.bingus",
		"id": "bingus_mod",
		"version": "${version}",
		"metadata": {
			"name": "Bingus Mod",
			"description": "This mod adds Bingus to Minecraft!",
			"contributors": {
				"Bingus": "Developer"
			},
			"contact": {
				"homepage": "https://example.org"
			},
			"icon": "assets/bingus_mod/icon.png"
		},
		"intermediate_mappings": "net.fabricmc:intermediary",
		"entrypoints": {
			"init": "io.github.bingus.bingus_mod.BingusMod"
		},
		"depends": [
			// ...
		]
	},
	"mixin": "bingus_mod.mixins.json"
}
Create a LICENSE for your mod. If you don’t know which license to use, check out this
link: https://choosealicense.com/. Note that GPL-3.0 and AGPL-3.0 are both incompatible
with Minecraft, so don’t use them. Once you’ve chosen a license, put the license’s plain text
in a file named exactly LICENSE.
Delete the LICENSE-TEMPLATE.md file. It’s not necessary to have since it’s the license for
the template, not your mod.
Change the name of the directories in the src/main/java folder to reflect your mod.
For example, if your Maven group is io.github.bingus and your mod’s ID is bingus_mod,
you should have four directories in total. IntelliJ IDEA should make this step easier for
you when you rename the directories; just change the whole line to match your group and ID.
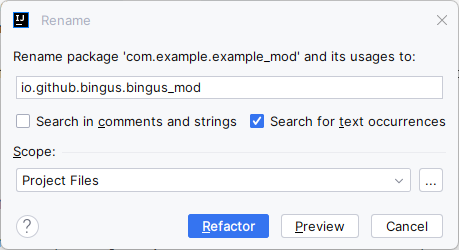
Delete the com.example directories.
Rename ExampleMod to your mod’s name using Java class naming conventions. Check that the
package declaration at the top is correct!
In the resources folder, change example_mod.mixins.json to the file name you set in
quilt.mod.json. Change the name of the folder inside assets to be your mod’s ID.
Your directories and file names should not have any traces of “example” in them anymore.
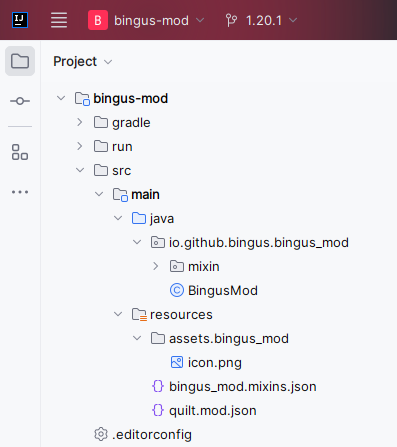
If the versions in gradle/libs.versions.toml are out of date, replace the old version
number with the new ones obtained from this link: https://lambdaurora.dev/tools/import_quilt.html
We’re almost done! The last step is to generate the Minecraft sources with Vineflower.
This is so you can view Minecraft’s code with the power of Quilt’s decompiler.
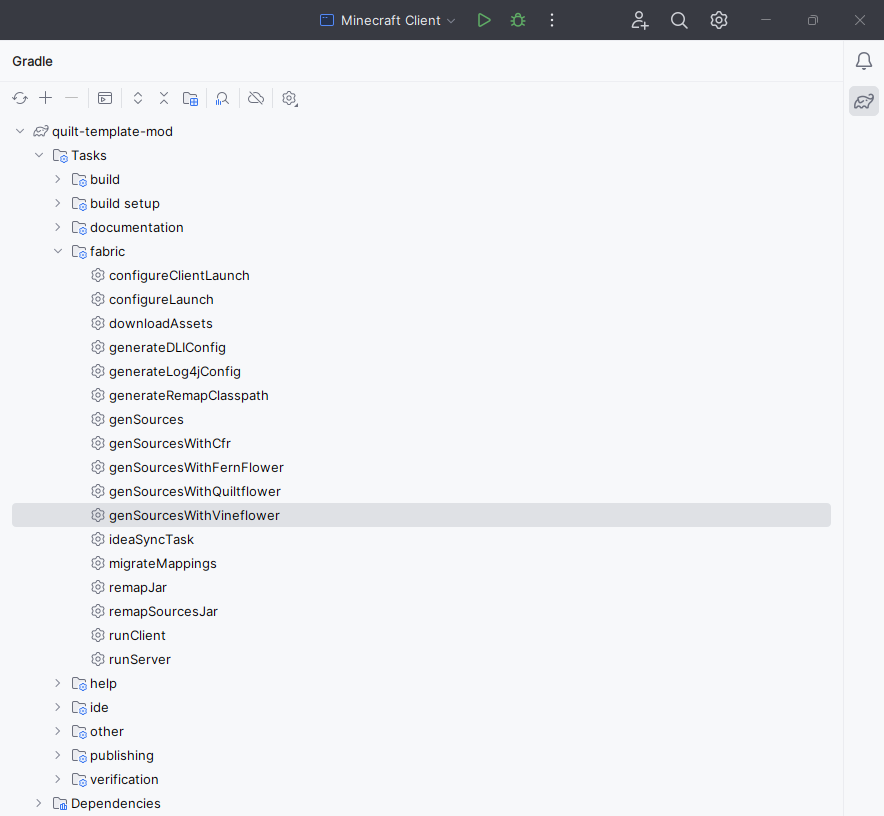
In the Gradle menu, go to the fabric category and run the genSourcesWithVineflower
task.
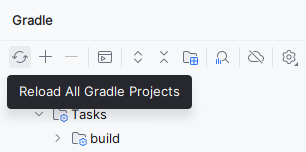
Finally, reload the Gradle project by pressing this button in the Gradle menu:
Once you’re done with all of these steps, your mod is ready to be worked on! You can start by adding content via the “Creating your First Item” and “Creating your First Block” tutorials.